Rhino Plugin
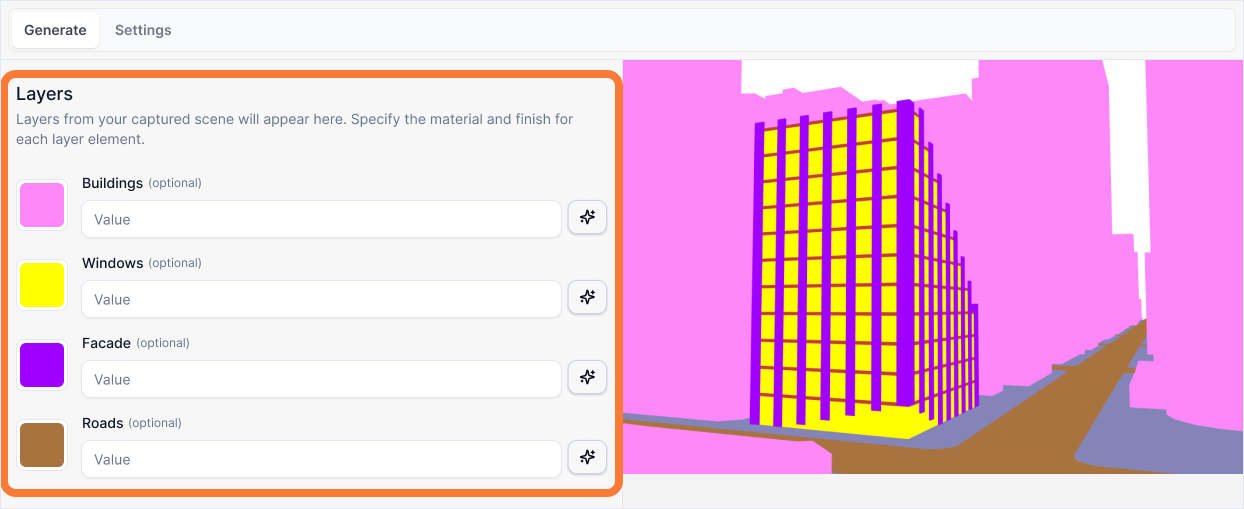
Layers
The Layers input allows you to provide detailed text descriptions of the desired appearance for each of your model's components, which are defined by your Rhino layers (e.g., FLOORS, WINDOWS, FACADE). This is where you act as the material and detail designer for your project.
Layers
What it is:
A detailed text description of the desired appearance for each of your model's components, which are defined by your Rhino layers (e.g., FLOORS, WINDOWS, FACADE). This is where you act as the material and detail designer for your project.
Influence and importance:
The quality of your final render is directly tied to the quality and detail of these descriptions. Vague descriptions will lead to generic, unpredictable materials. In contrast, specific, detailed descriptions provide the AI with a clear, unambiguous target to aim for, resulting in a professional and consistent look every time.
What To Pay Attention To:
For the most predictable results, build your description using this specific four-part syntax:
[Material Type] + [Color & Pattern] + [Finish] + [Application/Scale]
Material Type: Be specific. "Board-formed concrete" is better than just "concrete." "Oak" is better than "wood."
Color & Pattern: Describe the visual character. "Light sandy-beige with creamy-white veining" is better than "beige."
Finish: Describe how light interacts with the surface. Is it "honed and matte," "polished and highly reflective," or "rough and non-reflective?"
Application/Scale: Describe the geometry of the texture. Is it composed of "wide planks," "large-format panels," or "thin vertical slats?"
Writing Effective Layer Descriptions
Follow this four-part structure to create complete material specifications:
[Material Type] + [Color & Pattern] + [Finish] + [Application/Scale]
Example 1: Floor Region
A wooden Floor
A rustic oak floor with warm honey tones and prominent grain, a smooth satin finish, laid in wide, staggered planks.
Why the second prompt is better:
This prompt provides a complete physical specification by following the structural syntax:
Material Type: "A rustic oak floor..." Establishes the base category.
Color & Pattern: "...with warm honey tones and prominent grain..." Defines the visual character. Without this, the AI might choose a desaturated grey wood or a knot-free texture.
Finish: "...a smooth satin finish..." Tells the AI how light should interact with the surface (soft reflections vs. high gloss).
Application/Scale: "...laid in wide, staggered planks." Crucial for realism. It defines the geometry of the texture itself. "Wide planks" tells the AI to scale the texture up.
Example 2: Facade Region
Concrete facade
A rough, board-formed concrete facade with a neutral, mid-grey color, a non-reflective matte finish, applied as large, continuous vertical panels.
Why the second prompt is better:
This matches the syntax perfectly for a hard material:
Material Type: "A rough, board-formed concrete facade..."
Color & Pattern: "...with a neutral, mid-grey color..."
Finish: "...a non-reflective matte finish..."
Application/Scale: "...applied as large, continuous vertical panels."
Example 3: Window Region
Glass windows
Modern, floor-to-ceiling clear glass window walls with minimal black aluminum frames. Behind the glass, suggest a softly lit, active open-plan office interior with blurred silhouettes of people.
Why the second prompt is better:
This prompt describes a complete system rather than just a surface:
Glazing: "Modern... clear glass window walls"
Frames: "...minimal black aluminum frames."
Interior Context: "...suggest a softly lit, active open-plan office interior..." This is the most critical part for windows; it adds depth and realism to the final image.
Best Practices
When writing layer descriptions:
Use the four-part structure - Always include Material Type, Color & Pattern, Finish, and Application/Scale for predictable results.
Be specific about materials - "Board-formed concrete" is better than "concrete." "Rustic oak" is better than "wood." Specificity prevents generic results.
Describe visual character - Include color variations, patterns, and grain. "Light sandy-beige with creamy-white veining" gives the AI much more to work with than "beige."
Specify finish properties - Tell the AI how light interacts with the surface. This determines whether you get matte, satin, or glossy results.
Define texture scale - Always describe how the material is applied. "Wide planks" vs "thin slats" creates completely different visual results.
For windows, add interior context - Windows benefit from describing what's behind the glass. This adds depth and realism to the render.
Match your Rhino layers - Ensure your layer names in Rhino match the components you're describing. Clear layer organization makes this process much easier.
The quality of your layer descriptions directly determines the quality of your final render. Take time to be specific and complete.